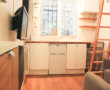
This week, we’re taking care of the parquet floor renovation, and more precisely the sanding stage. In this house, apart from the kitchen and the entrance, which are in cement tiles, the other rooms and the staircases have an old oak wooden floor, in very bad condition but that can still be saved.
When we bought the house we weren’t sure ifwewould be able to save the living room parquet floor, because it was very curled and swollen due to the humidity which reigned in the house. But after airing it out for several weeks, the parquet floor returned to its original shape. In the bathroom, we replaced the damaged slats with second-hand slats that were the same size as our parquet floor.
Equipment needed to sand a parquet floor
- Professional parquet sanding machine
- Edge sanding machine
- Sanding belts and discs of different grains: 40, 80 and 120
- Vacuum
- Dry cloth
- Dust protection masks (very important!)
We rented all the equipment for a week since there are 80 m² of parquet to renovate, as well as the staircase. The store also provided us with all the sanding belts and discs, knowing that we’ll only pay for what we used when we bring back the machines.
What are the steps to follow to sand a parquet floor properly:
I didn’t have time to take pictures of the different steps, so instead I’ll explain how we proceeded to sand the parquet floor.
- Clean the floor with a vacuum cleaner and thena dry cloth
Before starting to sand, we cleaned the parquet to get rid of dust and other dirt.
- First sanding pass with a coarse sanding band (32 or 40)
This step is necessary if the parquet is in poor condition, in order to remove as much material as possible, and level the surface well. At the end of this step, the parquet is a little rough but begins to regain its raw appearance.
- Second pass with an intermediate grain (60 or 80)
This second pass of the machine will refine the sanding, and make the wood smoother.
- Third and last pass with a fine grain (100 to 120)
This last pass with a fine-grained sanding strip will finish the sanding step and make ithe parquet floor very soft to the touch.
- Edge sanding machine pass
The parquet sanding machine is too big to be able to sand the sides and angles of the room. We therefore need to use an edge sanding machine to sand these areas. You must follow the same steps descirbed above, and carry out the three passes with coarse, medium grain and then finer sanding paper.
- Cleaning
Even if the machines usually carry a dust collecting bag, there’s still a lot of wood dust to clean in the room. It is therefore necessary to vacuum once the sanding is finished to remove it entirely.
The parquet is now ready to receive its finish!
The parquet floor sanding took us a good week and we didn’t have time to sand the staircase as well. So we decided to do it later, at the end of the renovation work, after the painting and bathroom renovation, because it was going to be damaged anyway with the dust and passage even if being protected.
We now have to varnish this parquet floor. For the detail of this step and photos of the final result, it’s here in my next post: How to varnish a wooden parquet floor.
Parquet flooringRenovationRenovation journalSanding